
Craftsman Garage Door Opener Installation Guide – Step-by-Step Instructions for a DIY Install
Welcome to our comprehensive guide for installing your Craftsman garage door opener. Whether you’re a seasoned DIY enthusiast or a first-time home improver, this step-by-step guide will help you install your garage door opener confidently. With clear and critical instructions, safety reminders, and handy tips, you’ll be well-equipped to tackle this project in no time. Let’s transform your garage with a new, reliable Craftsman door opener.
Understanding Garage Door Opener Parts
If you are about to embark on a DIY garage door opener installation, understanding the different parts of the opener is crucial. You need to know the various components that make up the garage door opener to be able to install it correctly. To guide you through this process, refer to the GARAGE DOOR OPENER manual for detailed information on the parts and their functions.
Exploring Basic Parts of a Craftsman Garage Door Opener
Starting with the essential parts of a Craftsman garage door opener, you have the motor, drive mechanism, and control system. The motor is the heart of the garage door opener, powering the operation of the door.
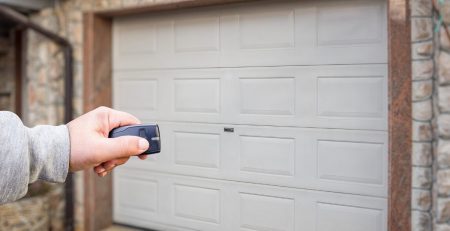
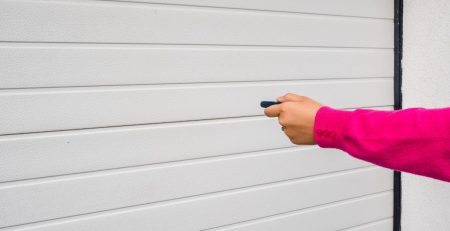
The drive mechanism, which includes the belt, chain, or screw drive, is responsible for lifting and lowering the door. The control system consists of a wall switch and remote control, allowing you to operate the opener inside or outside your garage.
Unique Features of Craftsman Garage Door Openers
Regarding special features, Craftsman garage door openers are equipped with safety sensors, an auto-reverse mechanism, and secure access codes. The safety sensors prevent the door from closing if an object or person is detected in the way, ensuring your and your family’s safety.
The auto-reverse mechanism reverses the door if it encounters an obstruction during closing. The secure access codes also prevent unauthorized access to your garage, keeping your belongings safe.
Pre-Installation Preparations
Before you start the installation process, you must ensure that you have all the necessary information and tools. In this section, we will go through the pre-installation preparations that will set you up for a successful DIY installation of your Craftsman garage door opener.
Lastly, before you begin the installation, it’s essential to familiarize yourself with the Owner’s Manual for your garage door opener. This manual provides essential information about the installation process, important safety guidelines, and troubleshooting tips. Be sure to thoroughly review the manual before getting started with your installation.
Necessary Tools for a DIY Install
The right tools for the job are essential for a successful garage door opener installation. You will need a power drill, screwdrivers, adjustable wrenches, a level, and a ladder. Additionally, it’s a good idea to have a tape measure, safety goggles, and work gloves to ensure your safety and efficient installation. Having these tools at your disposal will make the installation process smoother and more efficient.
Safety Precautions During Installation
When it comes to installing a garage door opener, safety should be your top priority. Before starting the installation, ensure that the power to the garage door opener is turned off to prevent any accidents.
Additionally, read and follow all safety guidelines in the owner’s manual. It’s essential to wear safety goggles and work gloves to protect yourself from any potential hazards during the installation process. Furthermore, ensure you have a sturdy ladder and someone to assist you with the installation, especially when dealing with heavy lifting. Following these safety precautions will help ensure a safe and successful installation process.

Unpacking and Understanding Craftsman Garage Door Opener Parts Location
When installing your Craftsman garage door opener, the first step is to unpack and take stock of the parts. Identify the motor unit, rail, traveler, idler pulley, and all other components. Familiarize yourself with the location of each part as outlined in the instruction manual. It’s crucial to understand the placement of each part to ensure a smooth installation process.
Guide to Installing the Craftsman Garage Door Opener – Part by Part
Before diving into the installation, take the time to review the installation guide provided by Craftsman. This will give you a clear understanding of how each part fits together and the order in which they should be installed. Following the step-by-step guide will ensure you install the opener correctly and safely. Take note of any warning or safety instructions to avoid accidents or mishaps during installation.
Troubleshooting and Maintenance
Your Craftsman garage door opener is a reliable and long-lasting piece of equipment that requires regular maintenance to ensure optimal functioning. If you encounter any issues with your garage door opener, it is essential to troubleshoot the problem before seeking professional help. Often, the problem can be quickly resolved with a few simple steps.
Common Issues and Solutions After Installation
After installing your Craftsman garage door opener, you may encounter common issues such as the door not closing correctly, noisy operation, or the remote control not functioning. In most cases, these issues are quickly resolved. Ensure that the safety sensors are correctly aligned and free from any obstructions, lubricate the moving parts of the opener, and check the batteries in the remote control. If the problem persists, refer to the troubleshooting section of your owner’s manual for further guidance.
Maintaining Your Craftsman Garage Door Opener
Maintaining your garage door opener is essential for its longevity and smooth operation. Regular maintenance tasks include lubricating the moving parts, checking the safety sensors, and tightening loose hardware. It is also essential to test the auto-reverse feature of the opener periodically to ensure your and your family’s safety. By staying proactive with the maintenance of your garage door opener; you can avoid potential malfunctions and ensure its reliable performance for years to come.
So, whether you’re a seasoned DIY-er or a first-time home improver, the Craftsman Garage Door Opener Installation Guide provides clear, step-by-step instructions to install your new garage door opener successfully.
Following the guide, you can safely and efficiently set up your garage door opener without professional help. With the right tools and attention to detail, you can have your new garage door opener up and running quickly. Trust us to guide to help you get the job done right. Good luck with your installation!
FAQ
Q: What tools do I need to install a Craftsman garage door opener DIY?
For the DIY installation of a Craftsman garage door opener, you will need a ladder, tape measure, level, screwdriver, wrench set, hammer, and power drill. Make sure you have all the necessary tools before starting the installation process.
Q: How long does installing a Craftsman garage door opener take?
The time it takes to install a Craftsman garage door opener will vary depending on your experience level and the specific installation instructions. On average, it can take anywhere from 2 to 4 hours to complete the installation process. Following the step-by-step instructions in the installation guide is essential to ensure proper installation.
Q: What safety precautions should I take during the installation process?
Safety should be a top priority when installing a garage door opener. Remind disconnect the power source and follow all safety guidelines outlined in the installation guide. Ensuring the garage door is balanced correctly, and all moving parts are installed securely to prevent accidents is essential. If you need clarification on any aspect of the installation, it is recommended that you seek professional assistance to ensure the safety and functionality of your garage door opener.